
Meeting my Cricut Maker 3

Before Cricut approached me about trying the Maker 3, I will admit I spent many afternoons in Joann Fabrics trying to understand which machine did what, googling and referencing the shiny packages of materials that seemed like a secret language I couldn’t figure out.
As a hands-on, see it, touch it to learn it kind of gal - I get it now y’all.
I see you, buddy who makes the whole gang custom coffee mugs for every occasion regardless of whether it’s actually a worthy occasion.
I see you, custom T-shirts for the whole family mom.

And now let me reintroduce myself, Mid-century Millennial AKA the girl who discovered Cricut in 2021 and will be making retro-inspired crafts until further notice.
As a DIYer, crafter and renovator who needs the right tools to bring my visions to reality, I am partnering with Cricut to share my honest experience of the Maker 3 with y’all.
I’m going to give you the basic intro to Cricut and show you my first project - if you want the 30-second cut check out my TikTok video.
…and what is a Cricut?
Hear how Mom aka Zooey Deschanel defines Cricut. While considering one throughout the years, I’ll be honest the variety of products confused me at first.
Q: What is a Cricut?
A cutting machine.
What do you do with it?
Use an image in their online design software or upload your own, load your materials (paper, vinyl, fabric, leather, depending on the model), the machine cuts to the shape, you may need to remove excess material called “weeding” and voila. Next, it could be assembly for something simple a card or if your materials require, you may be transferring a vinyl sticker to a water bottle or heat transfer onto a shirt as an example.
The possibilities are limitless - clothing, housewares, decor, accessories, gifts, crafted uniquely by you.
Okay, but real quick - does it print?
One point of confusion for me originally which feels silly to admit but no dumb question is a dumb question as the good teachers said: can you actually print with the Cricut?
No, you print, THEN Cricut. This is the printer I like to use for printing quality, and will use for my Cricut projects that require printing an image.
What model should you get?
In order from most simple and compact to largest and fully-featured you have the Cricut Joy, Explore 3 and Maker 3.
Check-out the comparison chart, but I like to think of the Cricut Joy as quick projects like labeling, stickers, cards and then work your way up to what I am using, the Maker 3 and I have yet to find something I can’t simplify in my DIY/crafting world using the machine.
What makes the Maker 3 so special?
So let’s break down what my machine, the Maker 3 can do (hint: it’s powerful):
You can cut an image up to 12 feet with Smart Materials, for me this is huge - i’m starting to work on some larger-scale wall decals with this feature
Smart materials don’t require a mat, you just feed them directly into the machine
300+ compatible materials and 13 different tools, it can cut, as well as its ability to write, draw and engrave. You may need some extra tools, like tips for different materials. I’m most excited to play around with the wood veneers for furniture upcycling.
It’s fast. Like really really fast.

My first project
Light-up 60s-inspired flower power vanity mirror
I love recreating DIY versions of coveted vintage items, like my Walmart Chiminea turned Mid-century Malm cone fireplace.
So naturally, my first project is vintage-inspired.
Inspiration
I’ve seen these amazing 1960s-1970s era light-up vanity mirrors on the internet but have never had the luck of scoring one for myself.
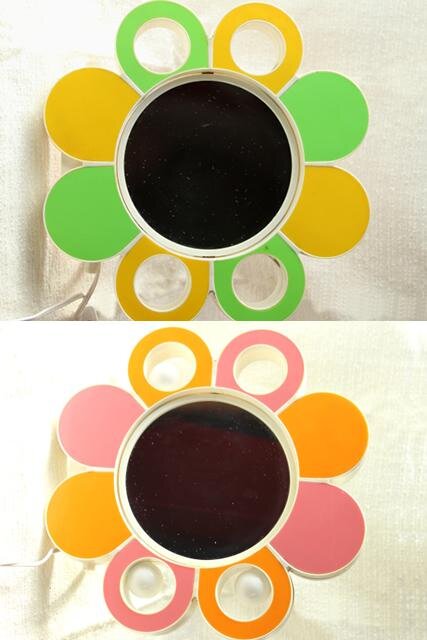
Because my home office works overtime as a craft room, maker space, and Mid-century Millennial headquarters I’ve been wanting to create an option for a floating vanity that doesn’t take up too much space.

So, after a few YouTube videos about how to setup and cut removable vinyl with the Cricut I gave it a go.
The Cricut Design Space has a lot of images and projects to choose from, but I knew as soon as I got the Cricut that I would be attempting to create very specific visions with the precision and flexibility of the tool.
The Flower was a very simple design to mock-up and create an image file, load into the Cricut Design Studio, resize and follow the simple, easy to follow prompts to load the removable smart vinyl and begin cutting.
Materials
Cricut Smart Removable Smart Vinyl - Maize Yellow, Party Pink
Any flower image from the Cricut design space that you like for your vibe!
Process
I created two sets of cuts, 4 petals each in two different colors, Maize Yellow and Party Pink so that I could alternate the colors just like the original mirror.


For the pieces with cutouts, after cutting out the shapes and weeding them (weeding vinyl is the process of removing the unwanted vinyl from your cut design), I applied them to transfer tape used to ensure smooth, easy application to the wall.
In hindsight, not sure this was necessary but was good practice for future more complex decals.
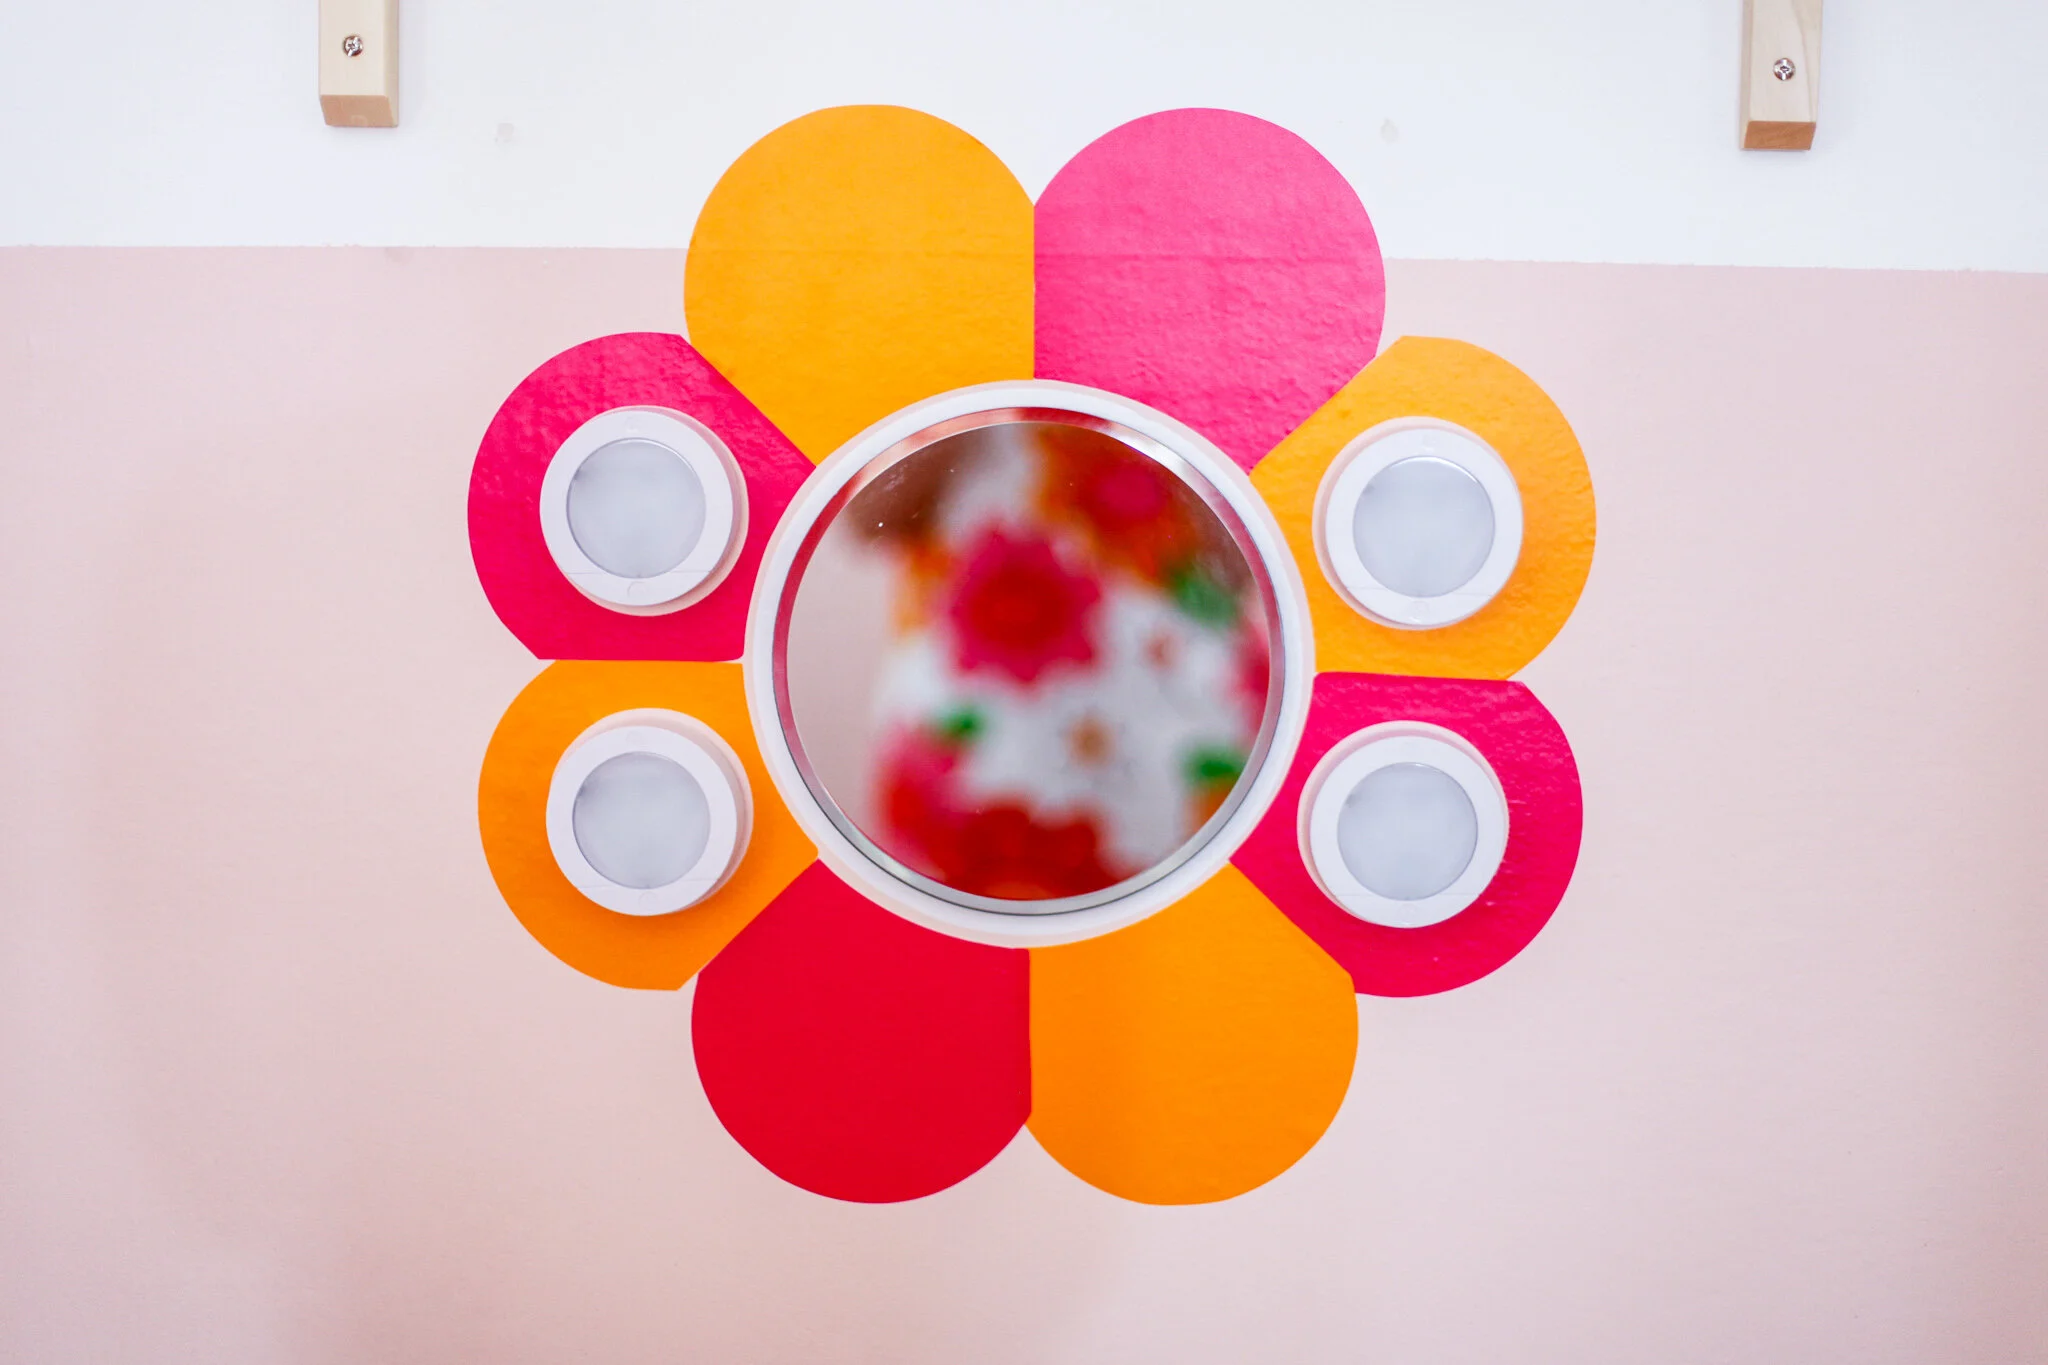
Lastly, I added a 9-inch round circle from Removable Smart Vinyl in white to go behind my 8-inch mirror I had on-hand and added tap-on 4 battery-powered puck lights.
What a glow-up!


Even though this was a simple project to start off my Cricut journey, I am already impressed with how quickly I was able to get up and running and bring my vision to life. Stay tuned for more retro-inspired DIYs.
Have questions you want answered? I’ll be going deeper on my experience as I get more projects under my belt! Let me know in the comments what you’d like to know.